Showing posts with label Adirondack Ink Pad. Show all posts

Sunday, November 11, 2012

Wednesday, October 24, 2012

Merry Christmoose Card

I’ve had my eye on this funny moose for a while, he’s from Bugaboo Stamps and it really made me smile. I‘d love to see a real moose in the wild one day.  Anita's 12th Bday October 2012 012 

  I’d love you to come and Join our Challenge this week at

Twist of Faith  for our 8th Challenge

ANIMALS

The prize offered to our randomly drawn prize winner is from Bugaboo Stamps .Pop over and see my team mates cards over at Twist of Faith
Challenges I am entering:

Have a great week

Hugs Trish Munro

Sunday, October 7, 2012

Sunset Seagull Card

I used Seafaring Seagull Frame from Meljens and I was totally inspired by a card I saw over at my blogging friend Brenda’s of Floral Fantasies and have had something in mind for a while. I enjoyed making the background. October 2012 020

I’d love you to come and Join our Challenge this week at

Card Crafter’s Circle 43rd  Challenge

AUTUMN COLOURS
 Meljens is our sponsor for this weeks challenge and there is a prize ! Our Design Team at Card Crafter’s Circle has created some beautiful creations to inspire you! Check them out!

Challenges I am entering:

  1. Catch the Bug - Anything Goes
  2. Crafty Bloggers Network - Anything Goes
  3. Daisy Doodles - One for the Boys
  4. Forever Friends - Anything Goes
  5. Kaboodle Doodles - Colours of Autumn
  6. Paper Pretties - Fall Inspiration
  7. Tammy's Scrappin Corner - Fall Colours
  8. Do You Stack Up - Warm Colours
  9. Pixie Dust Studio - Anything Goes
  10. Crafty Creations - Colours of Fall

Have a great weekend

Hugs Trish Munro

Friday, September 21, 2012

Roses & Ribbon Pocket Card

When I decided to use this Full Bloom Rose digi this week from Happileigh Scrappin all I could visualise was a pot full of flowers. So I made a Flower Pot Pocket Card and changed the dimensions to suit my image. I used a kraft coloured cardboard scrap of packaging that had black marker writing on it and most of that is concealed by being either under designer paper or inside the pocket, but the kraft colour was just right for what I had in mind. After I made the base of the card I sponged the edges with pink ink inside and out and now it’s finished you would never that I recycled this cardboard but I’m trying to be thrifty and even the ribbon is from a box of chocolates I was given about three years ago.I also used a second lovely thick ribbon underneath and the sheer one over the top for a lovely effect. There is some gain by being a hoarder and today was the day I used a few bits and pieces up that have been in my stash for years!!! Roses Sept 2012 008

Roses Sept 2012 013

I’d love you to come and Join our Challenge this week at

Card Crafter’s Circle 41st  Challenge

Our Sponsor this week is Happileigh Scrappin

Our random prize winner will receive the images showcased by our Design Team at Card Crafter’s Circle! 

Challenges I am entering:

  1. House of Gilli - More than 1 Fold
  2. Paper Pretties - Use Ribbon
  3. Crafts & Me – Roses
  4. Divas by Design - Lovely Layers
  5. Penny's Challenges - Shaped Cards
  6. Cutie Pie – Shaped Cards
  7. Ribbon Girl -Photo Inspiration (Pink & Green)
  8. Oldie but a Goodie – Ribbons
  9. Cute Card Thursday - Different Shaped Card
  10. Little Miss Muffet - Anything but Square

Have a great weekend

Hugs Trish Munro

Friday, August 31, 2012

Noble Deer Head Christmas Card

I made this Christmas Card with a masculine theme and used this Noble Deer Head from  Stamp Art Design by Kathryne as my focal point. I love to decorate the house at Christmas time to help celebrate the occasion and it’s great to be able to make my own cards for friends and family to add that personal touch! Dear Head  Card August  2012 016 

I’d love you to come and Join our Challenge this week at

Card Crafter’s Circle 38th  Challenge

FOR THE FELLA’S

Creations should follow a Masculine Theme

Our Sponsor Di’s Digi Downloads is providing a $10 Store credit to the winner!We also have Stamp Art Design by Kathryne joining us again with sponsorship for you! 

Our Design Team at Card Crafter’s Circle has created some beautiful creations to inspire you! Check it out!

Challenges I am entering:

  1.  Sketch and Stash - Challenge 95
  2. Diva's by Design - Let's Celebrate
  3. Simon Says Stamp - Anything Goes
  4. Emerald Faeries - Punches /Dies
  5. Creative Card Crew – Christmas
  6. LEJ Designs - Anything Goes
  7. Hooked on Craft - Cards for Men
  8. Crazy Challenge - Anything Goes
  9. The Squirrel & The Fox - One for Men

Have a great weekend

Hugs Trish Munro

Friday, June 8, 2012

Prom Queen

This week I am using the Prom Queen digi from  Stamp N Doodle and I used a Monochromatic colour scheme. I wanted to add texture to my layers so I used my embossing folders. I used a shaving brush to add colour to my last embossed layers and after I coloured my image with my Copics I added some more ink by masking my girl and inking with Adirondack Ink the edging again with my shaving brush. Using the shaving brush adds tiny dots of ink and the more times you hit the paper the deeper the colour gets. I also did this effect on my flower and it ended up a nice rich colour so that all colours matched for my monochromatic colour scheme. I already has these pearls in my stash which turned out great and to add something extra I  used Dimensional Magic on my heart and the word kiss and also tiny smidge to my flower to have a slight gloss to it. I only used half of my Prom Queen image to instill a sense of thinking about the moment!

Prom Dress 037


Prom Dress 038

  Prom Dress 042

I’d love you to come and Join our Challenge this week at

Card Crafter’s Circle 26th  Challenge

      this week we challenge you to create in a MONOCHROMATIC colour scheme!  We want to see what you can do with one colour (allowing for black line images, white cardstock etc) ....

We are excited to have this fabulous sponsor  Stamp N Doodle


Our randomly drawn challenge winner will receive 2 digis.

Swing by and see the great creations showcased by the Card Crafter’s Circle Design Team.

Challenges I am entering:

  1. Stella Says Sketch (as above) Challenge 12
  2. Ooh La La Creations - Make it Girly
  3. Digital Tuesday - Anything Goes
  4. Crop Stop _ Monchromatic
  5. Papaer Craft Bliss - Hand Coloured
  6. Crafting for all Seasons - Many Layers
  7. 4 Crafty Chicks – Monochromatic
  8. Sassy Studio Designs - Use something wet
  9. Celebrate the Occasion - Thinking of You
  10. Papertake Weekly - Anything Goes

Thanks for visiting me!

Hugs

Trish Munro

Friday, June 1, 2012

Astronaut Card

I have wanted to make a space card for ages and I’ve often seen rocket ships on boys cards and I was inspired by an article in an Australian Simply Cards to start creating. I started by carefully studying the night sky above my house and noticed that most of the stars were in a bit of a line directly above the house, I think it’s called the Milky Way so I placed my stars that I punched from some Kaisercraft designer paper in a similar line. I used a blank white cardstock card base and created my night sky using only 2 different blue inks Adirondack- Denim and Stampin Up- Tempting Turquoise I applied the inks using my Sponging block just like  I had seen Tim Holtz create a distressed background for a bookmark he made me when he was last in Australia. Then I used one of my home made green mica powder mists to help create my arty distressed night sky, that totally shimmers if you hold the card at an angle. I’m very happy with the result. Then my astronaut had to land in a rocket ship which I just hand drew straight onto some silver and red papers, and my daughter reminded me that my astronaut needed a couple of windows in his rocket ship so he could look outside,excellent point and duly noted and added! I made the flag from a bamboo skewer that I coloured with my Copics so it matched my beary cute astronaut.

This first photo is inside the card. 

Astronaut 1 June 2012 001

This is the card front .Astronaut 1 June 2012 006

Astronaut 1 June 2012 003

Astronaut 1 June 2012 010

I’d love you to come and Join our Challenge this week at

Card Crafter’s Circle 24th  Challenge

     The theme for you this week is 

STARS and STRIPES!

It doesn't have to be patriotic, but I know with the 4th of July is only a month away for all my American friends.

We are excited to have a fabulous returning sponsor 

MELJENS DESIGNS!

Our randomly drawn challenge winner will receive 4 digital images (uncoloured) of their choice... what a great prize!

  Swing by and see the great creations showcased by the Card Crafter’s Circle Design Team.

Challenges I am entering:

  1. Cute Card Thursday - Transportation Theme
  2. SJ Papercrafts-All about the Boy
  3. Willow Sketchie-Sketch or make your own backing paper
  4. Little darlings Challenges - Boy Card
  5. TuesdayThrowdown-Masculine
  6. Crafty Cardmakers- Distress It
  7. Daisy Doodles Creative challenge - Beary Cute
  8. Forever Friends - One for the Boys
  9. Lexi's Creations - For the man/Boy in our lives
  10. Simon Says Stamp and Show- One for the Boys       

Have a great weekend

Hugs Trish

Friday, April 27, 2012

Tilda Easel Card with Pearls and Lace

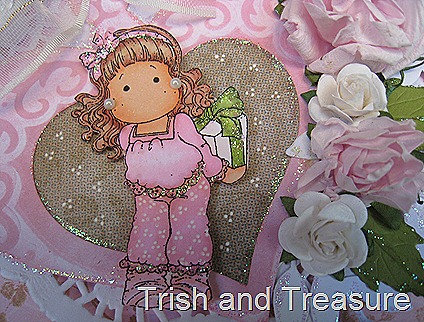
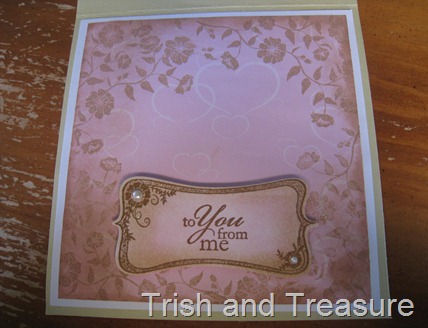
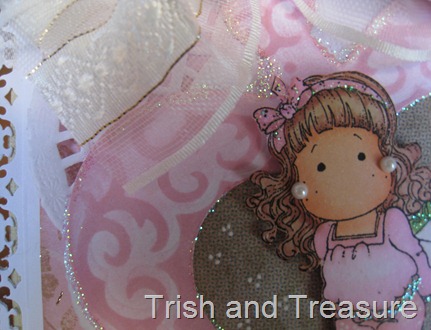
  On the love heart panel behind Tilda I distressed Kraft card and then stamps flowers and then added the series of tidy dots with my White Gel Pen. I borrowed this love heart Spellbinders locket from my girlfriend Vicki and then used it the sponge the design by placing the spellbinder over my die cut to mask over design,so now it’s embossed and highlighted. I used my Stamp It Sponging Block to distress the edges of a modern pink love heart designer paper panel both inside and on front of card with Kraft coloured ink after I had stamped my flowers. I added lots lace and pearls to create a soft romantic feel to my card and added lots of flowers! I borrowed my girlfriend Vicki’s die to cut the leaves. I added a healthy amount of glitter glue to highlight and I’m so happy with how this card  turned out, even though I didn’t use half the stuff I had out to get my mojo going. It’s funny how cards take a life of their own once you start creating. My husband is glad to have the dining table back for the weekend!   

Annie the Musical 24th April,2012 033

Annie the Musical 24th April,2012 034

Annie the Musical 24th April,2012 032

Annie the Musical 24th April,2012 042

Annie the Musical 24th April,2012 036

Annie the Musical 24th April,2012 037

Annie the Musical 24th April,2012 040

]I’d love you to come and Join our Challenge this week at

Card Crafter’s Circle 20th  Challenge

We're in a bit of a romantic mood this week, so we would love to see your creations embellished in

PEARLS and LACE

Our sponsor this week is another fabulous returning sponsor DI'S DIGI DOWNLOADS! Di is so talented with the pen, her designs are gorgeous, and there are so many for all occasions!  Our randomly drawn challenge winner will receive a $10 credit at the shop, which equals about 4 images, or they can choose to use it as a discount of a larger order! Woohoo! 

Our Design Team has been designing a storm this week, and are surely to wow you with their creations in Pearls and Lace! We hope you find inspiration in them!Swing by and see the great creations showcased by the Card Crafter’s Circle Design Team.

Challenges I am entering this week:


Have a great weekend

Hugs Trish Munro

Friday, December 23, 2011

Dearie Dolls Laundry Day Snowman Christmas Card Set

Christmas Cards December 2011 027

Join us for our second challenge over at Card Crafters Circle.

Our theme this week is:

Create for CHRISTMAS!

Sponsored by Dearie Dolls.

Winner's Prize is their choice of 3 digis.

image

Here is the digital image I used and printed it in two sizes.

Dearie Dolls Laundry Day Snowman

image


Christmas Cards December 2011 008


Christmas Cards December 2011 017

Christmas Cards December 2011 012

Christmas Cards December 2011 010Christmas Cards December 2011 011


Christmas Cards December 2011 014Christmas Cards December 2011 015

Christmas Cards December 2011 020Christmas Cards December 2011 021

I embossed the inside pockets of my cardholder for a touch of class and place 3 cards either side and held closed with a ribbon..

Inside view of the gift cards

Christmas Cards December 2011 009

In an effort to be frugal I always try to be as economical as possible with my projects as you can see.

As you can’t see…. as once it’s all glued down….. and otherwise it’s just such a waste!Christmas Cards December 2011 003

I made this Christmas card set as a present for one of my sisters.

Challenges I would like to enter with this project:

Merry Christmas

Trish Munro

Saturday, October 8, 2011

How to Store Your Inkpads

This storage  idea is perfect for Colorbox Chalk Inkpad, Brilliance Pigment Ink Pad, VersaMark, Castaway, Stazon & Adirondack Ink Pads.It is compact to store on a bookshelf or carry off to your local craft class.I used my Brother P-touch 1000 to label my inkpads and it’s been very handy over the years I’ve had it.
Please Subscribe to my YouTube Channel Trish and Treasure!
If you would like to subscribe to my YouTube Channel Trish and Treasure Click Here.
This year I decided to embrace technology, you know cameras ,computers, anything with an instruction manual and slowly I have been working it out, and I have even bought something on eBay.That’s huge for me. My friend Vicki Fraser has been very helpful in the world of computers and a huge thanks to her for her amazing patience. I have come a long way since the beginning of the year and I’ve done my New Years Resolution justice! So far, so good.
Have a great weekend
Trish Munro

Tuesday, August 16, 2011

With Sympathy

When I made this card I really wanted to have a cross on the front. A template would have been an excellent help but I just hand drew it and cut it out as I was keen to keep going to get the result I had imagined and visualised in my head. I love the metal brad I used with the flower it really anchored the card design. An extra layer of darker ribbon subtly popped the soft lace detail trim at the bottom edge of the card. I made my own Shabby Chic designer paper  which I distressed and have included a detail description so you can also have a go. I inked all the edges in Denim Adirondack Ink with a Stamp It Sponging Block to complete my distressed look.

Cards August 2011 005

Shabby Chic Designer Paper Technique

  • I chose some designer paper and clear embossed (wet) some swirls and curls, always use your anti-static bag over your paper before embossing.
  • Then brushed over some white gesso paint when almost dry, removed paint off embossed area. Then waited for all this to dry.
  • Protect your ironing board with a heat proof sheet like the Tim Holtz one.When paint is finally dry, place a sheet(or a few) of brown paper (not newspaper) over your designer paper and iron off the clear embossing until it vanishes, absorbed into a few layers of the brown paper. Best to use a sheet of baking paper as the top layer before you begin to iron as this will protect your iron base from any potential mess.
  • It leaves this amazing effect as you can see by my close up.

Cards August 2011 006

Cards August 2011 007

Challenges this card qualifies for:

Have a great week

Trish Munro

Monday, August 15, 2011

Shabby Chic Tag

One of the Mum’s at my daughter’s Dance Studio is an ex-police officer and now teaches Child Safety & Protection at Bond University on the Gold Coast, Australia. She is someone who makes a huge difference  in this world we live in and I admire her because she has devoted her life and career to protecting children and teaching others to be like herself. I was inspired to make her something and I decided a bookmark for her text books at work would be perfect!

The unusual wet embossing technique I used to make the designer paper shabby chic I will put the instructions in my next post!

Darling Daughter has had a busy few days and competed in the Gold Coast Eisteddfod.

The school choir routine of a melody of 3 songs was cute and all the kids dressed up like orphans, they didn’t win this year but just being in choir really improves my daughters quality of voice and she seems to sound crisper, not to mention has learnt so much.

Then she competed in her group dance routines. Under 10’s in 4 sections and she won 1st place in all 4 sections.I am so proud of her and all the effort she has put into her dancing this year, she has a work ethic to be envied. I am now thanks to you tube an expert hair dresser & make-up artist. I’ve also now perfected the art of applying False Eyelashes of which I am so proud of myself.

Yesterday at my daughters Year 5 Church service all the Year 5 kids did a play and sang. I looked everywhere but darling daughter wasn’t an actor or singer ….what the …..Anyway I spot her she is down at the back of the church coaching the year 5 choir on stage with all the actions and expressions for the kids on the stage.. I was great to see her Year 5 teacher use her talents in such an unusual way.

After church we headed out to watch hubby coach and my gorgeous son who is 15 play in the Under 19’s Youth Soccer game. I took 100’s photos and really enjoyed watching them both in action . I really enjoyed my weekend!


August 2011 Clarinet & Vincenzo Soccer 005

August 2011 Clarinet & Vincenzo Soccer 006


August 2011 Clarinet & Vincenzo Soccer 004

Challenges this tag qualifies for:

Thanks for visiting my blog

Trish Munro